Erase, crop and set contrast
Open for review, below any card, opens the stack in a viewer with a slider through all its images. You can also move through the images with the mouse wheel, the trackpad, or the left and right arrow keys.
The keyboard shortcuts are listed at the bottom of the viewer: the arrow keys, Delete to remove the selected box, and Esc to deselect a box and then close the viewer.
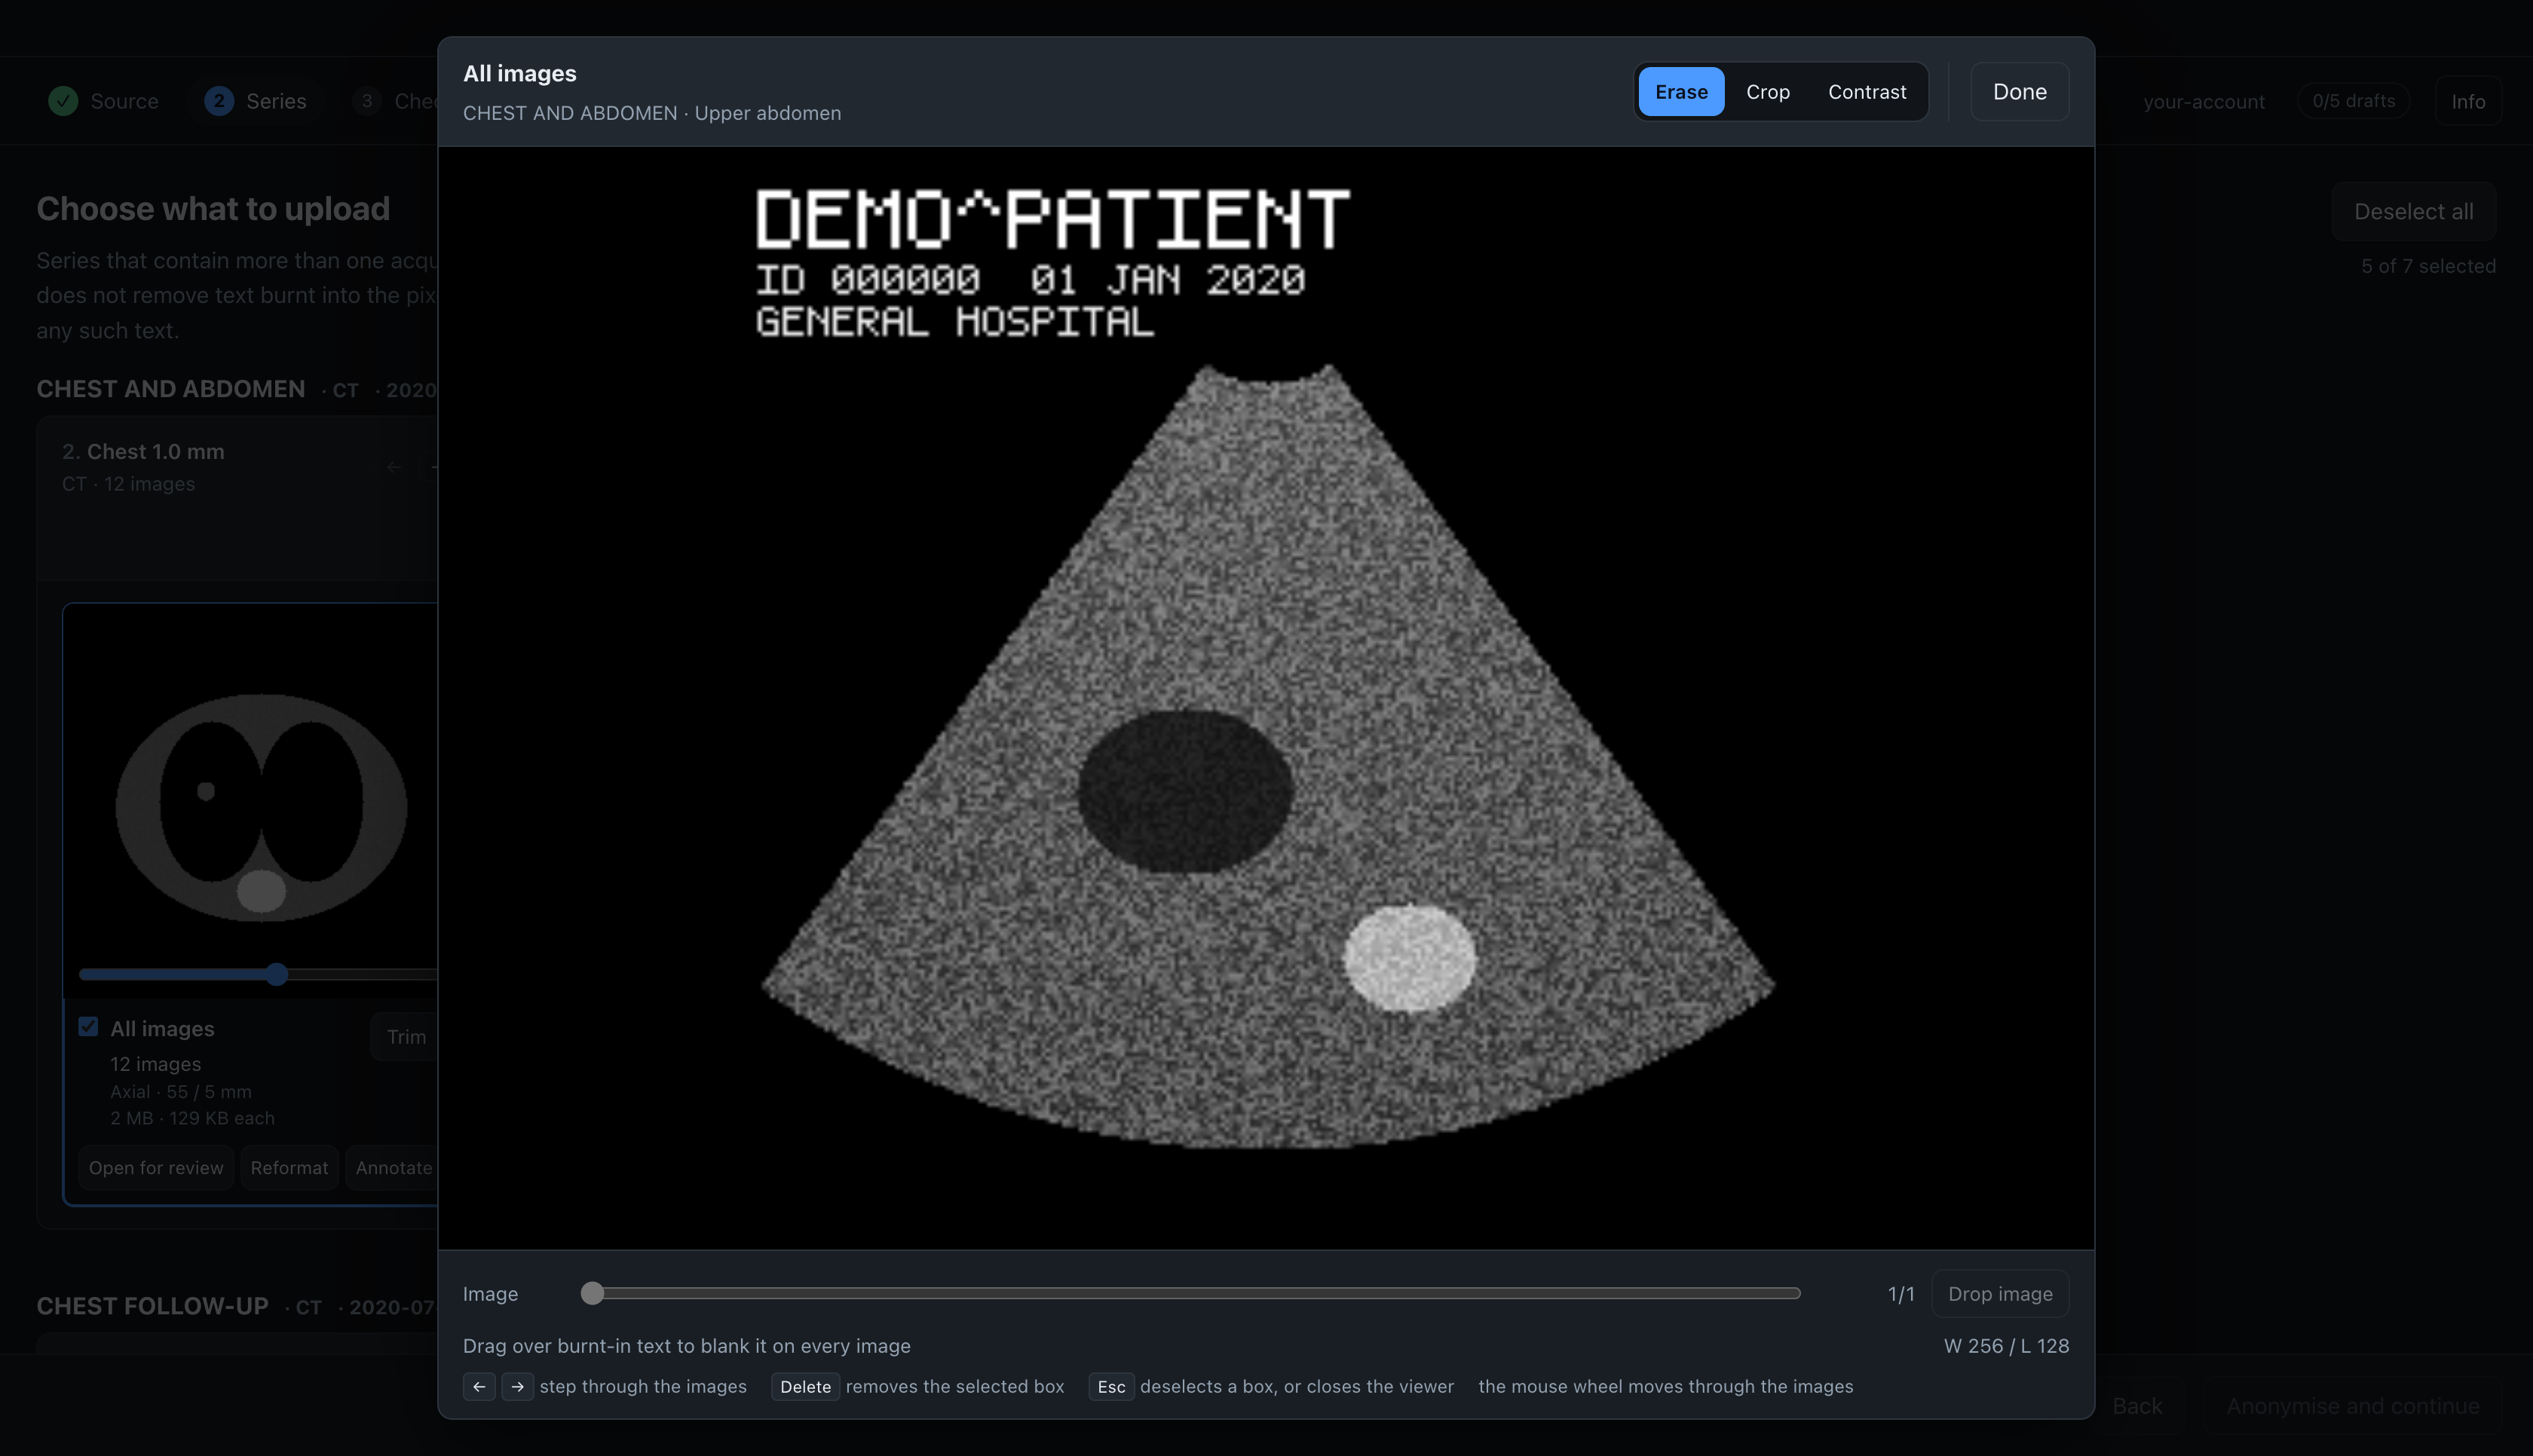
Erasing, cropping and the window apply to every image in the stack, because burnt-in text, margins and a suitable window are usually the same on every image of a series. Dropping an image applies only to the image on screen.
Drop an image
Drop image, next to the image number, leaves that image out of the upload. Use it for a single bad image in a series, such as one with motion, a duplicate, or one that shows the table edge.
A dropped image is marked dropped, the button changes to Keep image, and a count shows how many images are dropped. Keep all restores them all. On the card, the stack shows N of M images.
Dropping is different from trimming: a trim keeps a range of images and removes the ends of a stack, while dropping removes single images from anywhere in it.
Limits of dropping
You cannot drop the last remaining image of a stack. To leave out a whole stack, clear its tick box on the card.
A stack with an image dropped from the middle usually cannot be reformatted, because the gaps between its images are no longer even. If you want both, reformat first and then drop the image.
Erase
Choose Erase and drag a rectangle over anything that must not be uploaded, such as a patient banner on an ultrasound, annotations on a reconstruction, or scale text.
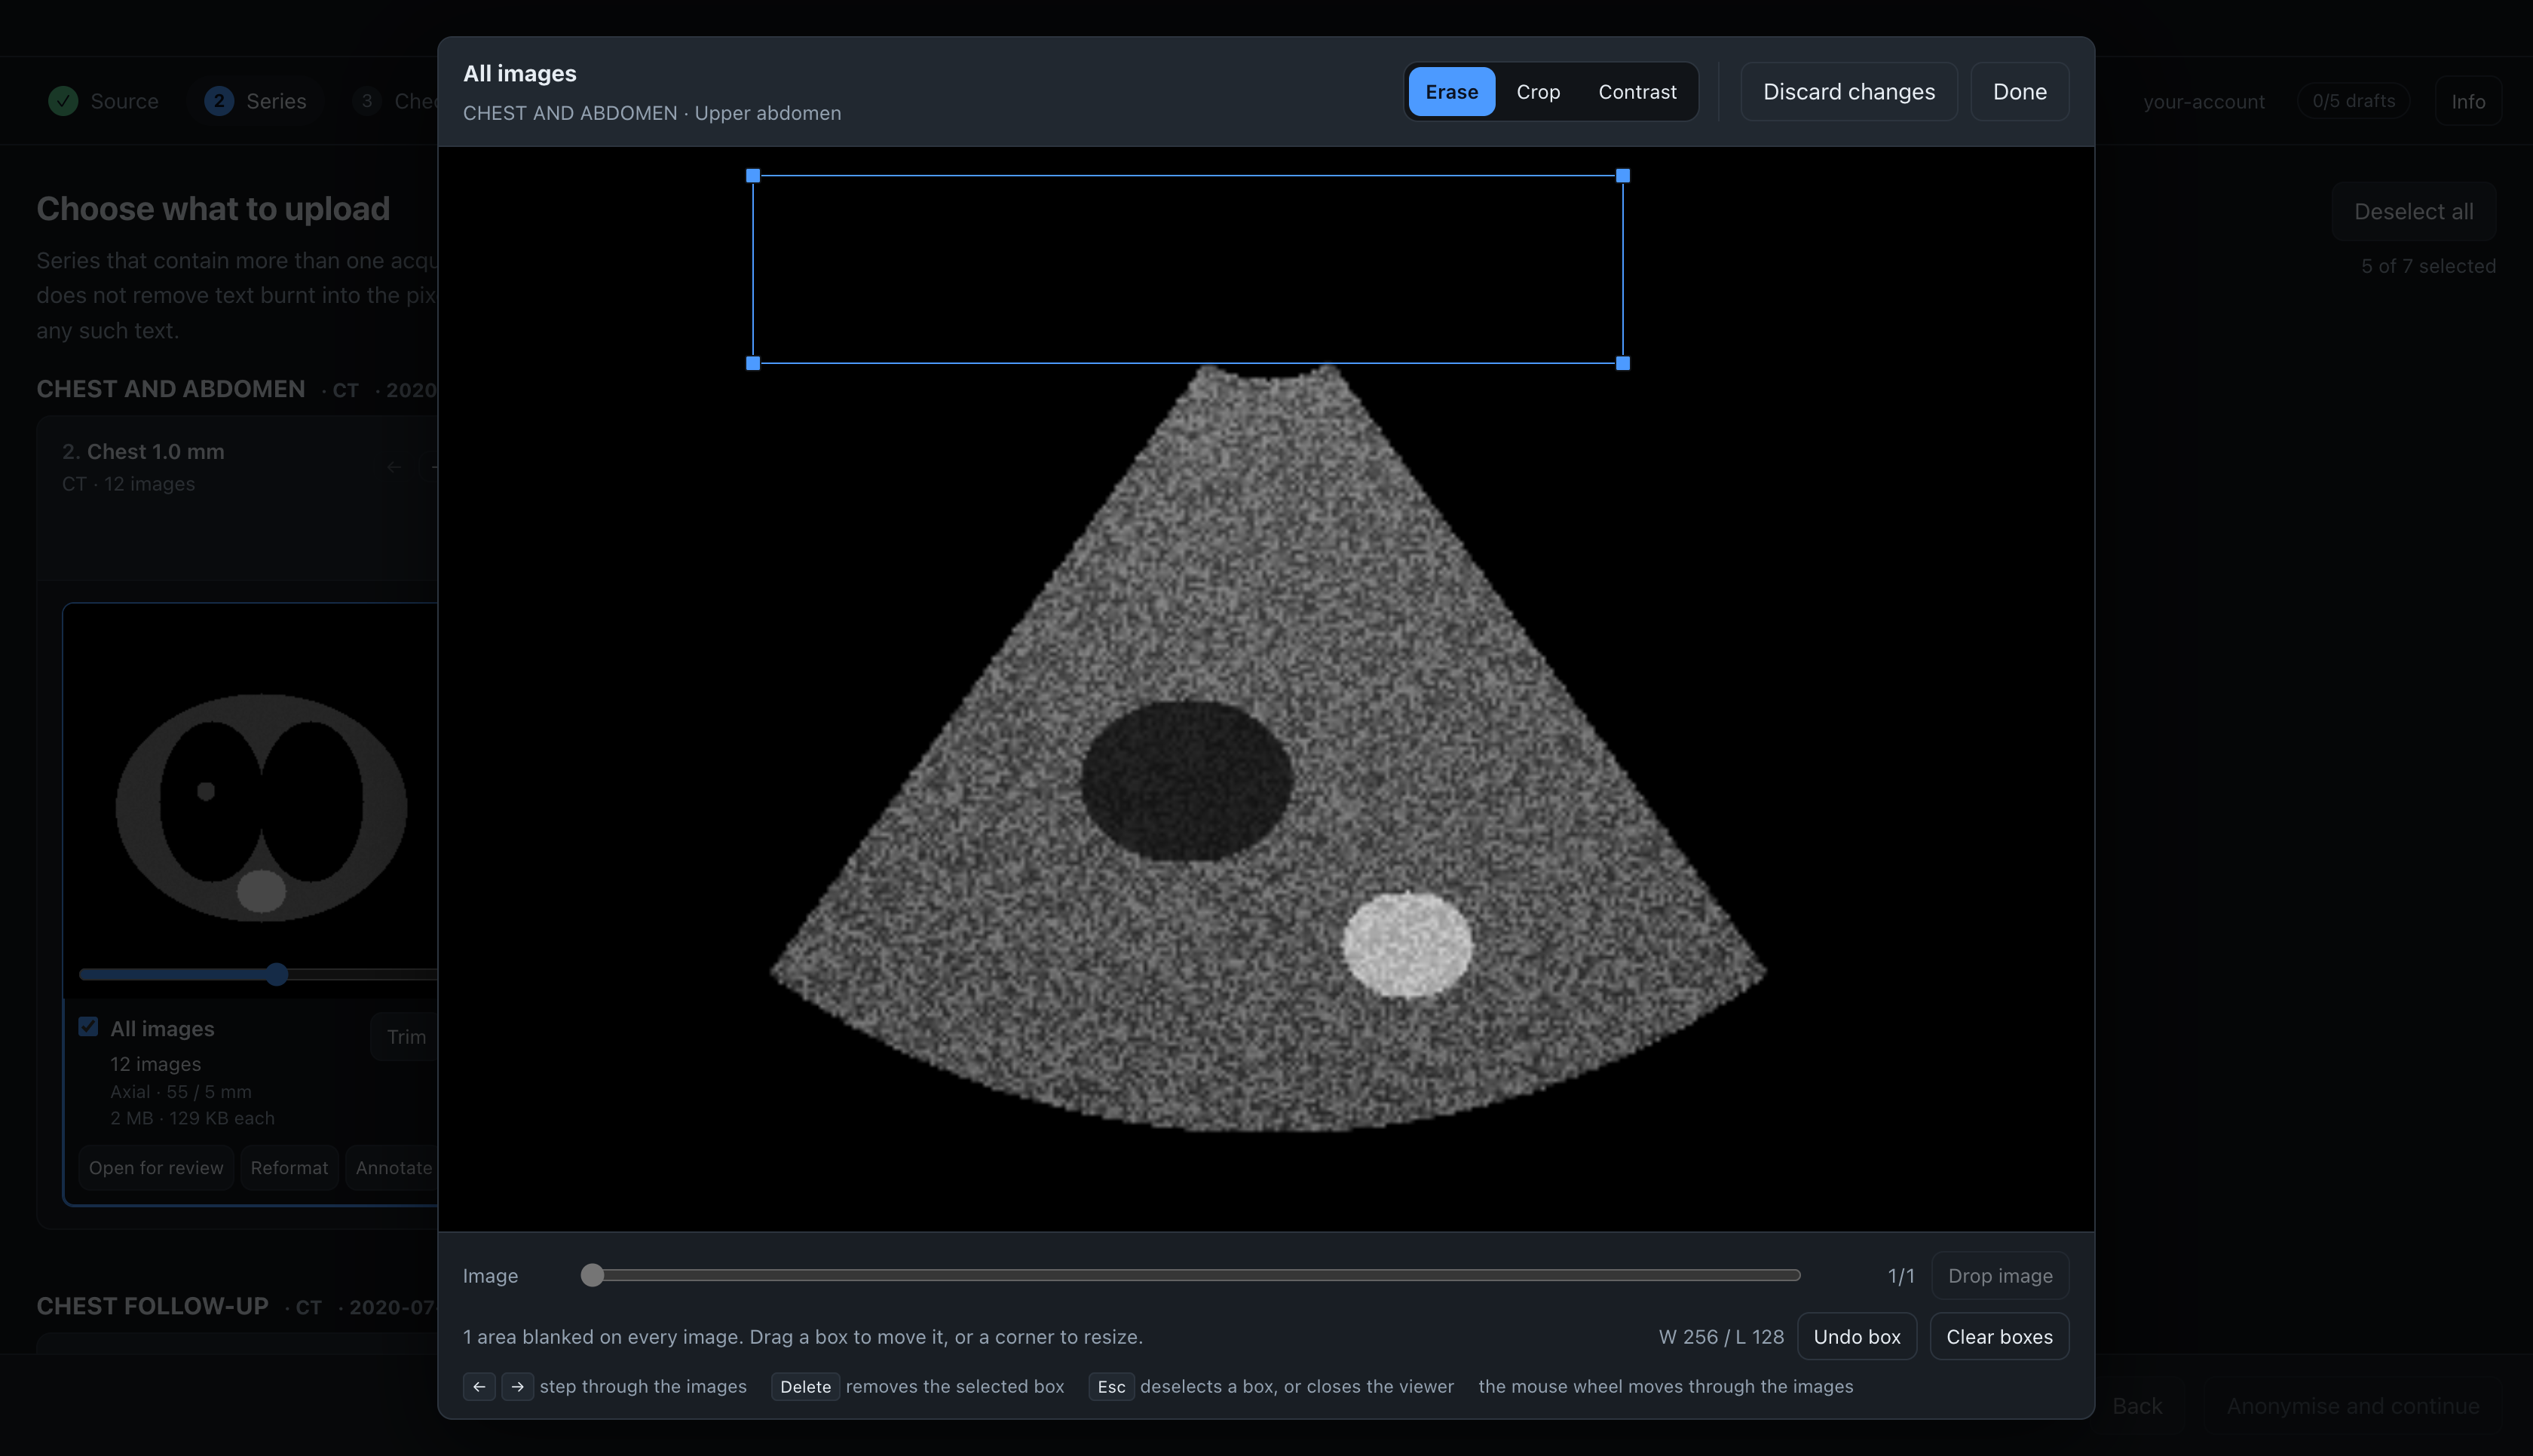
The rectangle applies to every image in the stack. During anonymisation it is written into the pixel data, so the uploaded images are blank in that area.
The blank area is black on every image. The app works out the black value for each image: on a CT it uses the darkest value of the current window (a value of 0 would show as soft tissue), on MONOCHROME1 images the brightest stored value (where 0 is white), and on colour images zero brightness.
The box you have just drawn is selected: drag its corners to resize it, or press Delete to remove it. Click any other box to select it, then drag it to move it, drag a corner to resize it, or press Delete to remove it. A box cannot be moved outside the image or resized to nothing. Esc deselects the box; pressed again, it closes the viewer.
Undo
Undo box and Clear boxes work until you anonymise. The original files are never changed; anonymisation writes new files.
Closing the viewer
Changes are saved to the stack as you make them, and the card shows the result. Done, Esc and clicking outside the viewer all keep your changes.
Discard changes appears once you have changed something. It restores the stack to how it was when you opened the viewer: blanked areas, crop, window and dropped images. It has no keyboard shortcut.
Crop
Choose Crop and drag a rectangle around the part to keep. Everything outside it is removed from every image in the stack.
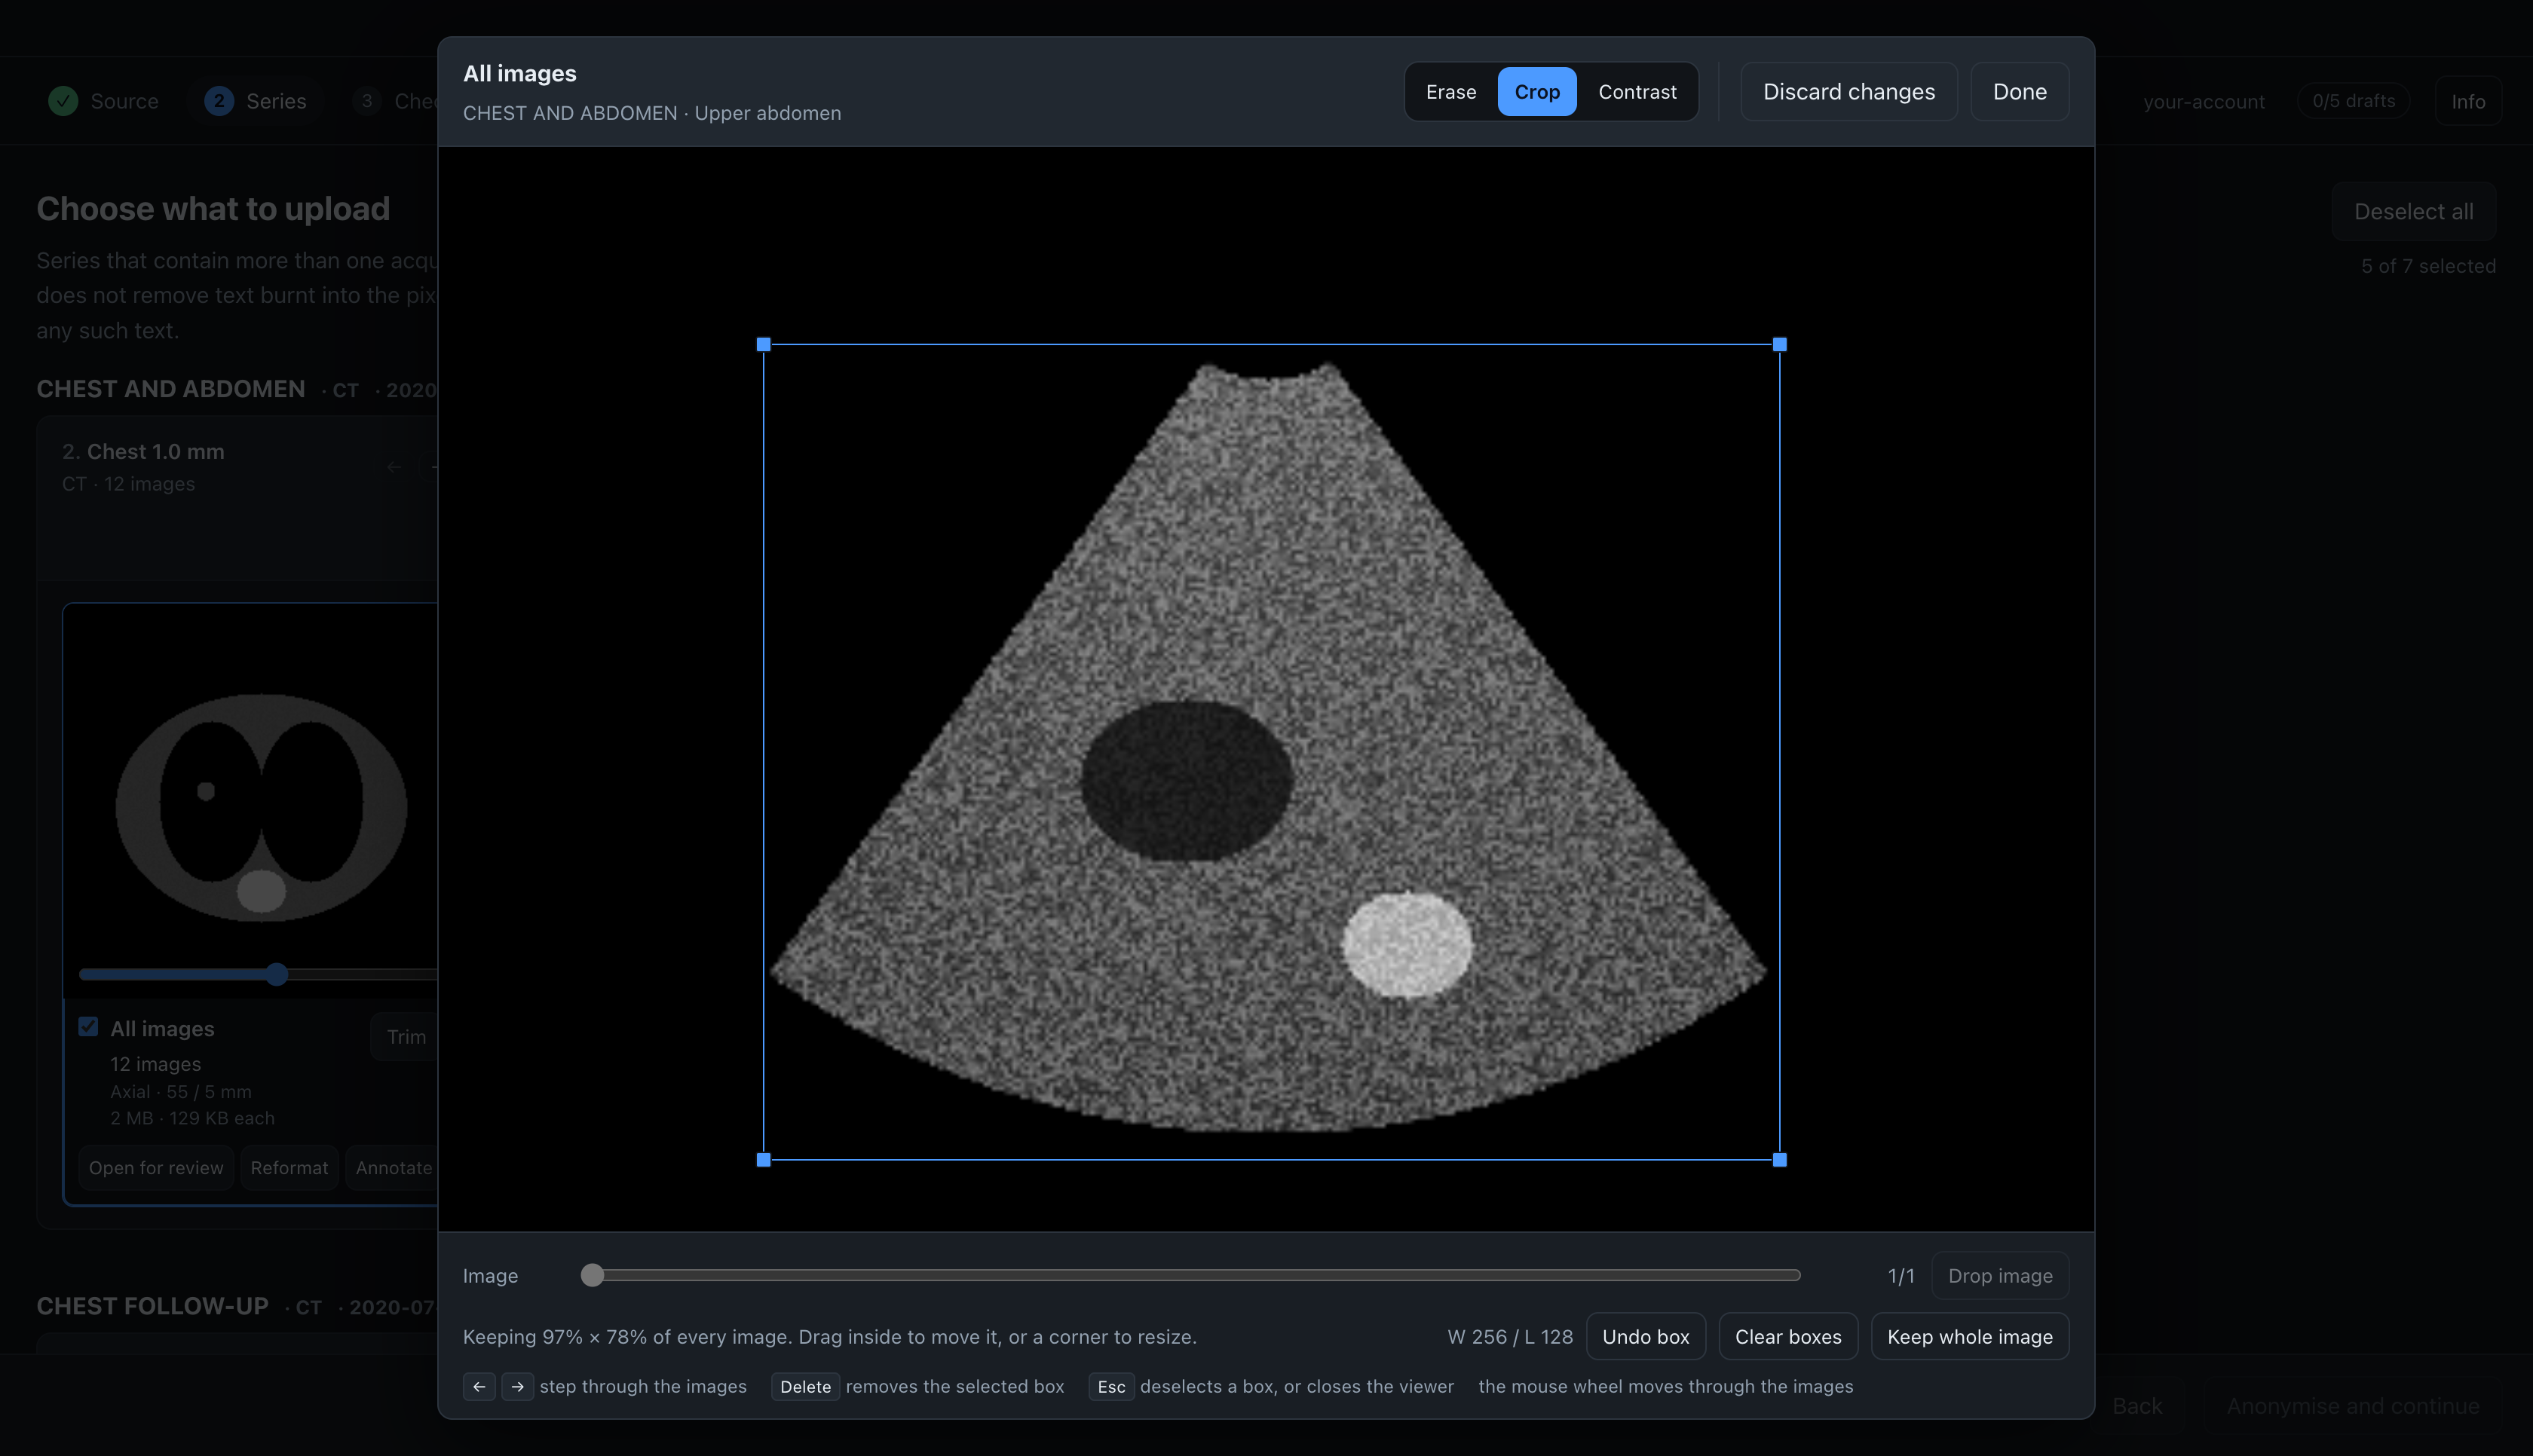
The whole image stays visible, with the part to be removed shaded. Drag inside the rectangle to move it and drag a corner to resize it. Keep whole image removes the crop.
One crop applies to the whole stack, because Reformat needs all images of a stack to be the same size.
Use a crop to remove black margins around an ultrasound sector, empty space around a reconstruction, or the strip that contained a banner. For burnt-in text, Erase is enough: erased areas are already blank in the uploaded pixels.
When the app crops, it updates Rows, Columns and ImagePositionPatient, the position of the image's top-left corner in the patient, so a volume built from the cropped images is in the right place. If a file does not state its orientation, the app cannot calculate the new position and removes ImagePositionPatient; the upload order does not depend on it. PixelSpacing does not change, so measurements on Radiopaedia stay correct.
Contrast
Choose Contrast and drag on the image: drag right to widen the window and down to raise its centre, as in other DICOM viewers. The current values are shown at the bottom right as W (width) and L (level). Contrast is not available for colour images.
CT window presets
For CT, the viewer shows a row of presets below the slider: Brain, Subdural, Stroke, Temporal bone, Lung, Soft tissue, Liver and Bone. Click one to set the window. The button stays highlighted while the window matches the preset, and the highlight goes off when you drag the window to other values.
The presets use conventional widths and centres. Adjust them as needed, for example for a nodule next to the pleura or an early infarct.
Presets are shown only for CT, because only CT pixel values are in Hounsfield units. On MR the values depend on the scanner, so fixed presets would not work. The same presets are available in the reformat dialog.
The window you choose is written to WindowCenter and WindowWidth (0028,1050 and 0028,1051). Any WindowCenterWidthExplanation or VOILUTSequence in the file is removed, because it would conflict with the chosen window. The pixel values are not changed, so the window can still be adjusted on Radiopaedia.
Compressed images
You can erase and crop compressed images (JPEG, JPEG-LS, JPEG 2000, HTJ2K and lossless JPEG). To do so, the app decodes the image and uploads it uncompressed, so the file is larger: the test image in the repository grows from 49 kB to 768 kB. Cropping reduces the size, but the file is still uncompressed.
An image with no erased area and no crop is uploaded unchanged. A crop that covers the whole image counts as no crop.
DICOM video (MPEG-2, H.264 and HEVC) is decoded into frames, which you can erase and crop like any other images. Each video frame is uploaded as JPEG, after erasing and cropping.